Raspberry Soda
Recipe updated June 24, 2025Fresh and fruity with a strong raspberry flavor. It’s a bit tangy, slightly sweet, and nicely fizzy. The ginger bug doesn’t add much flavor, it just helps with fermentation. So you mostly taste the raspberries.
I don’t use a large batch in this recipe because raspberries are often hard to get in big quantities. If you have plenty and want a more efficient method, check my ginger beer recipe, it shows how to scale up using a large fermentation jar.
Fermentation depends on many factors — the health of your ginger bug, room temperature, humidity, and the sugars you use. Every batch can behave a little differently, so stay observant and adjust as needed. If you see fuzzy mold on the surface, or if the drink smells rotten, yeasty in a bad way, or otherwise unpleasant, it is safest to discard it — do not taste it. Clean all tools thoroughly before starting a new batch.
Time required
20 minutes for mashing the raspberry and adding pectinase, 5 hours waiting for pectinase to break down pectin, 30 minutes for straining and bottling, 3-4 days for fermentation. This doesn’t include the time to make the ginger bug starter.
Measurement system
Expected yield 3.0 liters
Ingredients
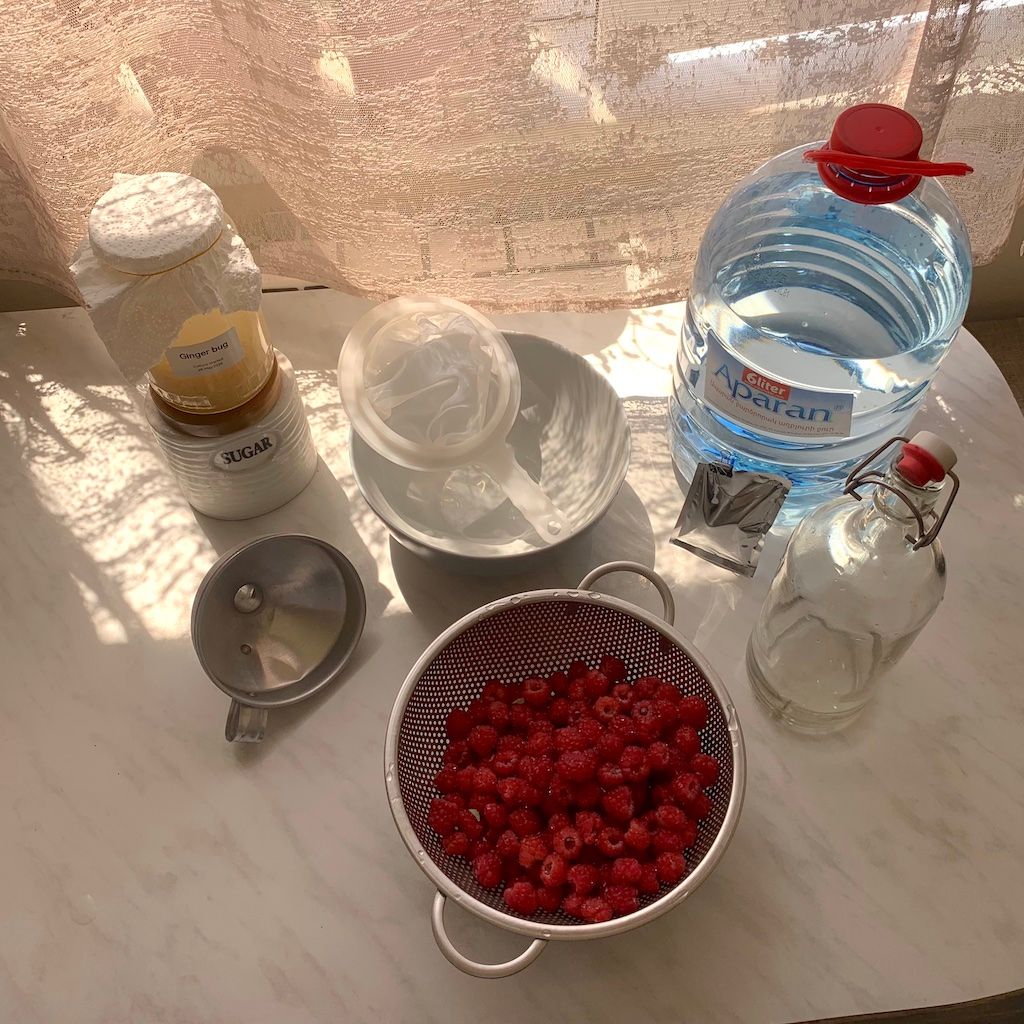
- 1.5 liters filtered water
- 150 g refined sugar
- 200 ml ginger bug
- 1.6 kg raspberry
- 5.16 g baking soda
- 3 g pectinase
Equipment
- Funnel
- Flip-top bottles
- Fine nylon mesh sieve (200+ micron)
- Stainless colander
- Airlock
- Measurement cup
Steps
Prepare ingredients and tools
Wash your bottles, tools, and hands to avoid introducing unwanted microbes.
Rinse the raspberries with cold water
Use a stainless colander to gently rinse the berries. Cold water preserves texture. Avoid hot water, it can soften the fruit and dilute the juice uncontrollably.
Crush the raspberries into a pulp
Break down the raspberries to release juice. Use your hands or a tool, raspberries are soft enough to mash easily without extra equipment.
Add pectinase, stir well, and let sit for 5 hours at room temperature
Raspberries are rich in pectin, which thickens the mash and clogs filters. Stir in pectinase to break it down and help the juice separate from the solids. Pectinase works best between 20–50°C (68–122°F). Warmer temperatures within that range speed up the process, but avoid going above 50°C, heat can deactivate the enzyme.
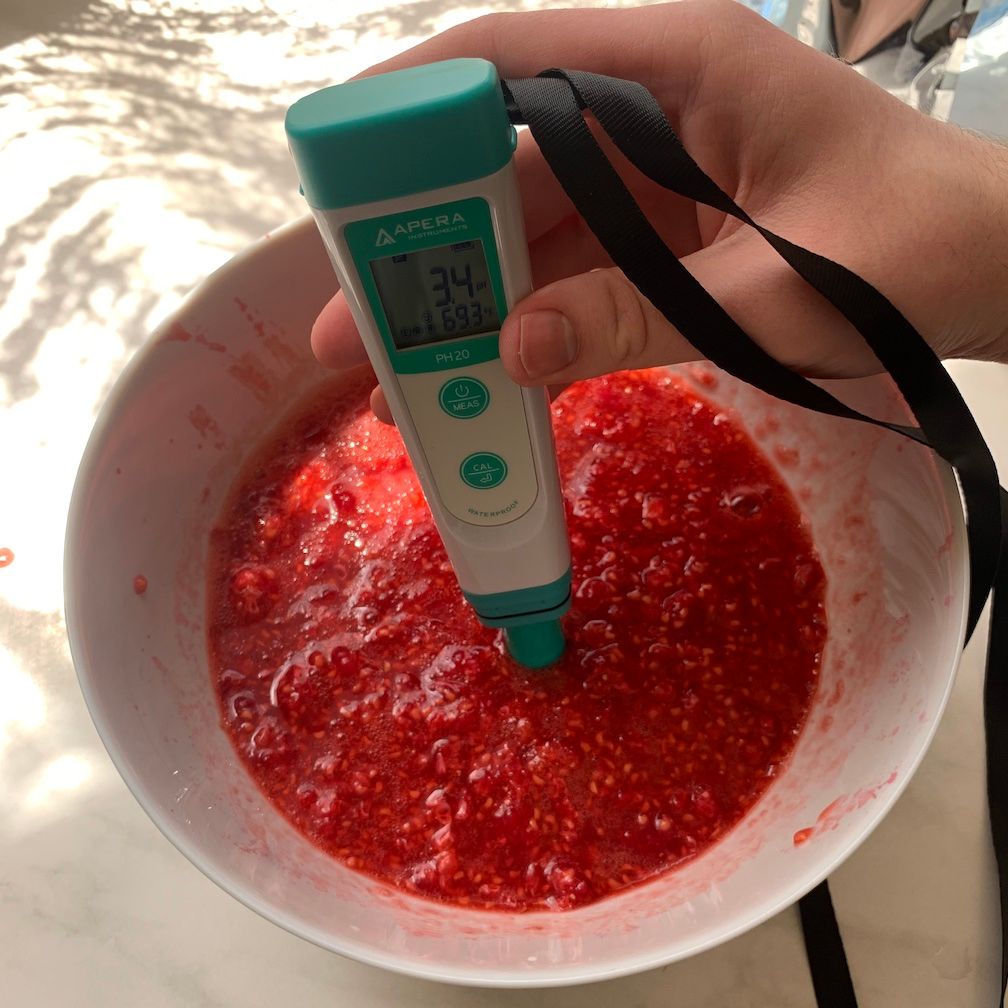
Measure acidity (optional)
Use a pH meter to check your mash. Raspberries are acidic, mine had a pH of 3.4. This matters because very low (acidic) pH can stall fermentation. I used the Apera AI209 Value Series PH20 pH meter. If you don’t measure, proceed based on taste and dilution as described below.
Dilute the juice with filtered water
To reduce acidity, dilute the raspberry mash with an equal volume of filtered or dechlorinated water (1:1 ratio). This lowers the pH while keeping flavor strong. Avoid tap water, chlorine can weaken the culture.
Adjust pH with baking soda if needed
If your juice is still too acidic after dilution, add a small amount of baking soda to raise the pH. I added 0.5 tsp for 1 liter (~34 fl oz) of drink, which raised my mash from pH 3.4 to 3.8, a safer range for fermentation with ginger bug.
Strain the mash to separate juice from solids
Strain the mash thoroughly, this is the most time-consuming part. I used a spoon and fine nylon sieve. It took 30 minutes. If the juice is still thick, give the pectinase more time.
Add sugar for fizz and flavor balance
If your juice tastes too sour or the berries weren't sweet, stir in refined sugar to balance the flavor and feed fermentation. Adjust to your taste.
Pour the juice into flip-top bottles
Use a funnel to fill clean bottles. Leave headspace at the top — at least 3–5 cm (1¼–2 inches). This is to prevent overflow during fermentation.
Add strained ginger bug
Make sure the juice is at room temperature (20–27°C / 68–80°F). If it’s too hot, the culture may die.
Note: In the video, you’ll see I left some headspace in the bottle, but it wasn’t enough. Juice rose during fermentation and got stuck in the airlock, not fun to deal with. Leave extra space to avoid overflow or clogging.
Add a label to track the fermentation start date
I use a Niimbot thermal label printer to mark the start date. It doesn’t need ink, just thermal paper. And it’s convenient for editing and reusing templates for different drinks. Niimbot B1 label maker on Amazon.
Add an airlock and ferment for 2 days
Attach an airlock to each bottle instead of sealing them. This allows CO₂ to escape while keeping oxygen out. It reduces the need to manually burp the bottles and protects against spoilage.
Store the bottles at room temperature to ferment. Fermentation speed depends on the temperature, mine took place at 25 °C (77 °F), which is fairly fast. Cooler rooms may take longer.
Check for bubbles after 1–2 days
If your ginger bug is active and the room is warm, you should see bubbles forming in the liquid and the airlock by day two. It's a good sign of fermentation.
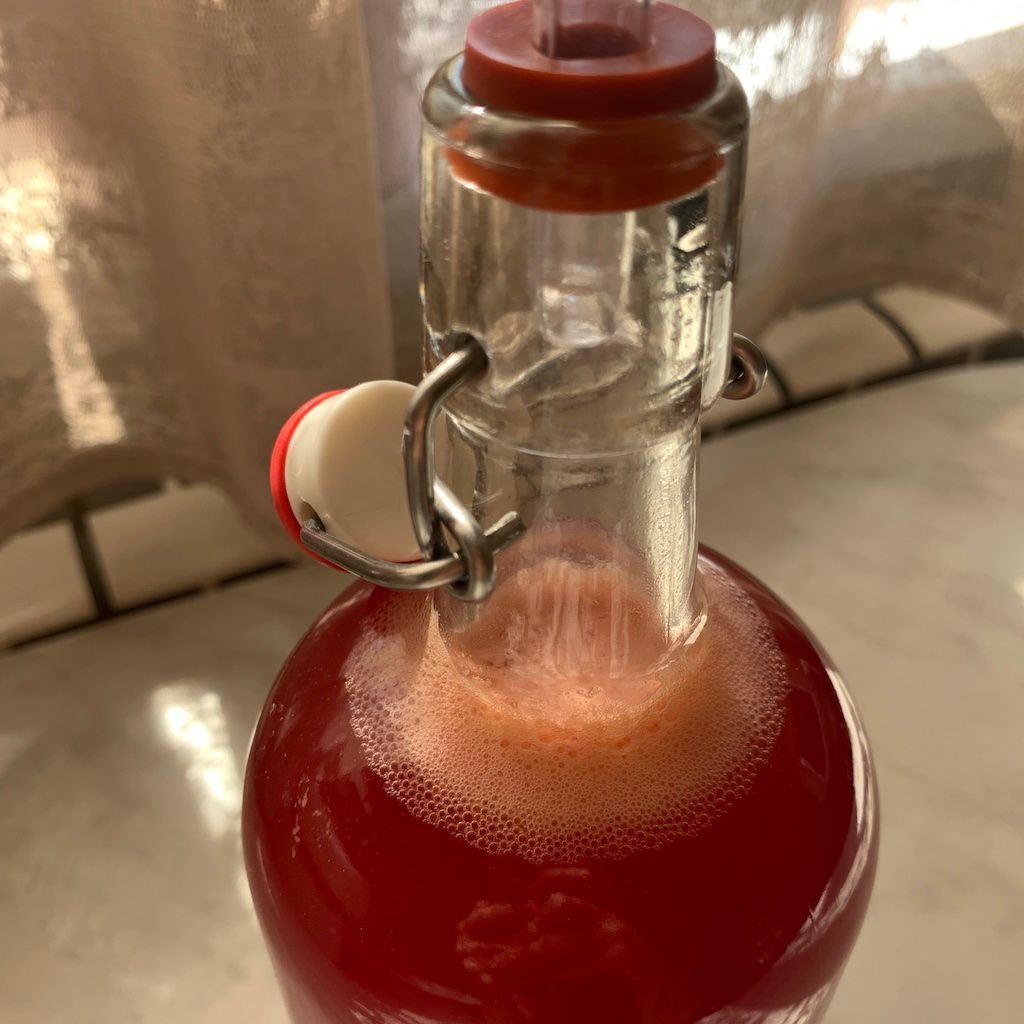
Watch for bubbles in the airlock
During fermentation you should see bubbles rising in the airlock, that's CO₂ escaping. If your room is warm and the ginger bug is strong, you should see activity within a day or two.
Seal the bottles for carbonation and ferment for another 2 days
Once the initial fermentation is complete and the flavor is where you want it, seal the bottles tightly. This traps CO₂ and builds natural fizz. For me, it took just two days to reach the desired carbonation level.
Remember to open each bottle once or twice a day to release built-up CO₂ and avoid bottle bursts. This is especially important if your ginger bug is active or you added extra sugar. The longer it ferments, the drier and fizzier it gets. When opening, hold the bottle over a sink and be ready to control any overflow — the drink can gush out fast. In my experience, larger, wider flip-top bottles open more gently than small, narrow ones.
Refrigerate
Once you’re happy with the carbonation level, transfer the bottles to the fridge. Cold slows fermentation, reduces pressure buildup, and helps avoid overflow when opening.
Consume within 2 weeks
Finish the drink within two weeks to get the best flavor and fizz. If you let it sit too long, the taste shifts and pressure can build up if fermentation keeps going.